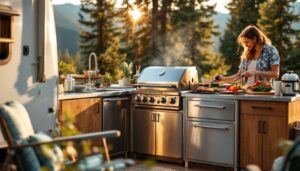
A charcoal grill sits at the center of nearly every memorable outdoor meal, there’s something irreplaceable about live fire, smoke flavor, and the ritual of grilling. Whether you’re starting from scratch or upgrading an existing outdoor kitchen, understanding how to select, position, and maintain a charcoal grill transforms it from a cooking appliance into the genuine heart of your outdoor entertaining space. This guide walks you through the essential decisions: what to look for when choosing your grill, how to design a functional layout that makes cooking easier, the right way to install it, and how to keep it performing for years. You’ll find practical advice grounded in real-world experience, without the Pinterest fluff.
Table of Contents
ToggleKey Takeaways
- An outdoor kitchen charcoal grill requires balanced sizing and high build quality—cast iron or stainless steel grates and a tight-sealing lid ensure durability and reliable heat control for years of entertaining.
- Position your charcoal grill at least 10 feet from your house and upwind of seating areas to ensure safety and prevent smoke from drifting toward guests during meals.
- Install the grill at standard 36-inch counter height with 24 inches of prep space on at least one side, creating an efficient workflow that prevents back strain and integrates seamlessly into your outdoor kitchen layout.
- Maintain your charcoal grill by brushing grates while warm, removing ash buildup every few cookouts, and using a weatherproof cover year-round—these simple habits extend equipment life significantly.
- Unlike gas systems, a charcoal grill works anywhere without permits or professional installation in most cases, making it the most accessible entry point for creating a functional outdoor entertaining space.
Why Charcoal Grills Are the Heart of Outdoor Kitchens
Charcoal grills deliver something gas and electric cookers cannot: authentic smoke flavor and the ability to reach high temperatures for genuine searing. They’re also surprisingly forgiving once you learn the basics. A charcoal grill works anywhere, no gas line required, no electricity hookup needed. You buy briquettes or lump charcoal, light them, and cook. That simplicity is part of their charm, but it’s also why they demand respect and proper setup.
From a design perspective, charcoal grills anchor an outdoor kitchen visually and functionally. They’re a focal point that draws people in, encouraging the chef-and-crowd dynamic that makes outdoor entertaining work. Unlike built-in gas systems that require professional installation and ongoing maintenance, a quality charcoal grill can stand alone or integrate into a countertop layout with minimal structural work, though placement still matters for safety and functionality.
They’re also the most accessible entry point to outdoor cooking. You don’t need a licensed contractor or special permits in most cases (check local codes), and you can relocate or upgrade without major expense. That flexibility is why charcoal grills remain the default choice for serious outdoor kitchens in 2026, from simple backyard setups to sophisticated entertaining spaces.
Choosing the Right Charcoal Grill for Your Outdoor Kitchen
Picking a charcoal grill means balancing size, build quality, and how it’ll fit into your cooking style. A small 18-inch kettle grill works for occasional grilling: anything larger than that, say, a 22-inch barrel grill or a rectangular offset smoker, signals serious intent and requires more space and fuel management.
Size matters because undersized grills create bottlenecks when feeding a crowd, while oversized ones waste fuel on small meals. Measure your available space first, accounting for clearance around the grill (typically 3 feet on sides and back for safety, per most fire codes). Remember that nominal grill dimensions (“22-inch” on the label) differ from actual cooking surface, the usable grate area is smaller.
Build quality separates grills that last five years from those lasting fifteen. Look for cast iron or stainless steel grates, a sturdy firebox, and a lid that seals tightly. Avoid thin steel without rust protection: it’ll flake and weaken in seasons. Heavy-duty grills often weigh 75–150 pounds, which is good, weight correlates with thermal mass and longevity.
Key Features to Look For
A thermometer on the lid is non-negotiable. Adjustable vents (top and bottom) let you dial in airflow and control temperature. Grates should be removable for cleaning and replacement. Ash management, either a pull-out drawer or easy access underneath, prevents cleanup from becoming a chore. Side tables or ledges give you a surface for tools and food prep, which you’ll quickly find essential. Wheels are optional but valuable if you think you’ll move the grill or clean underneath. Check whether the grill accepts a cover: a weather-resistant cover (canvas or polyester, not cheap plastic) extends life significantly by shielding from rain, UV, and temperature swings. Sources like Bob Vila and The Kitchn review specific models if you want detailed comparisons before deciding.
Designing Your Outdoor Kitchen Layout
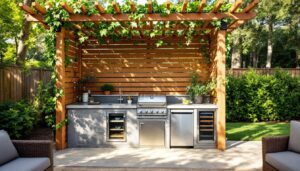
A well-designed outdoor kitchen layout clusters the grill with prep and serving zones, creating an efficient workflow. The grill shouldn’t float alone in the yard, it performs best as part of a system.
Start by positioning the grill upwind if possible, so smoke drifts away from seating areas. A small offset to the side of your entertaining zone prevents guests from standing in smoke while you cook. The grill needs clearance from structures: at least 10 feet from the house, 15 feet from combustible overhead elements (pergola beams, trees), per National Fire Code guidelines. Check your local codes: they may be stricter. If the grill sits against a wall or under a roof, you’ll likely need a fire-rated wall or a non-combustible shield.
Countertop placement (if you’re building a built-in) should put the grill surface at standard height: 36 inches from grade, the same as kitchen counters. This prevents back strain and looks intentional rather than jury-rigged. A drop-in charcoal grill like the Fire Magic Classic Drop-In Countertop model fits flush into a surround you’ve built, creating a seamless look. Side work surfaces, at least 24 inches of counter space on one or both sides, are where you prep food and set plated items. Position storage for charcoal, tools, and covers nearby, ideally in a covered cabinet away from weather.
Electrical (for lighting or fans) and water (for cleanup) are helpful but not essential for charcoal. If you’re running these, hire a licensed electrician and plumber: outdoor electrical requires GFCI outlets and proper wire rating (check NEC standards for outdoor installations). Do it once, do it right.
Installation and Setup Best Practices
Installation difficulty depends on whether you’re setting a freestanding grill or building it into a countertop. A freestanding grill on a patio is simple: level the ground, position the grill, and go. An integrated built-in demands more planning.
For a freestanding setup, create a stable, level base using pavers, a concrete pad, or gravel compacted firm. An uneven grill won’t hold charcoal evenly and temperatures will vary across the grate. If the ground slopes, shim with gravel or concrete to achieve level. Leave adequate clearance for airflow underneath: the firebox needs oxygen to draw air upward.
Built-in installation requires framing the surround, typically concrete block or brick, or a wood frame faced with stucco or stone. The firebox must be supported entirely by the surround: don’t rely on it to bear the counter weight. Use fire-rated concrete board or ceramic tile on interior surfaces where the grill sits, and non-combustible insulation (mineral wool, not foam) in wall cavities. Grout joints and seams should be sealed to prevent drafts. The counter itself, granite, concrete, or engineered stone, sits atop the frame with the grill dropped in from above. If you’re inexperienced with masonry or framing, hire a contractor for this stage. Mistakes here compromise safety.
Once installed, season the grill. Coat the interior with high-heat oil (not spray oil), run it at medium heat for 15 minutes, then let cool. This preps the steel and helps prevent rust. Stock charcoal briquettes or lump charcoal (briquettes burn longer and more evenly: lump burns hotter and faster, pick based on your cooking style). Keep a fire extinguisher rated for grease fires (Class B) nearby, and never leave an active grill unattended.
Maintenance and Care for Long-Lasting Performance
Charcoal grills outlast most outdoor appliances if you maintain them. After each use, brush the grates while they’re warm, debris comes off easier before it hardens. Scoop out ash from the bottom every few cookouts: buildup blocks airflow and shortens equipment life. A shovel and metal ash bucket make this fast.
Season the grates with oil occasionally. A light coat of vegetable oil applied after cleaning protects cast iron from rust. Stainless steel grates need less fussing but benefit from occasional cleaning with mild soap and a soft brush.
Check the thermometer annually for accuracy (hold it over a heat source to confirm readings). Replace any rusted or warped grates, they’re usually inexpensive and come standard on quality brands. Inspect the lid seal and hinge. If the lid doesn’t close snug, you’re losing heat and using excess fuel. A weatherproof cover is the single best investment for longevity. Use it when the grill cools after each session, and especially over winter or extended downtime. Rain and UV age unprotected steel rapidly.
For built-in grills, check annually that grout and sealant around the surround haven’t cracked. Cracks allow moisture into the frame, leading to structural damage. Re-grout or re-seal as needed, this is simple maintenance that prevents costly repairs later.
Conclusion
A charcoal grill elevates your outdoor space from a patio into a functional kitchen where real cooking happens. Choose a grill that matches your needs and space, design a layout that keeps the cook efficient and guests safe, install it properly with adequate clearance and support, and maintain it consistently. Done right, it becomes the anchor of outdoor entertaining for decades. The investment in quality and thoughtful placement pays back in every meal shared.