An outdoor kitchen transforms a backyard from a simple lawn into a functional entertainment hub where family and friends gather for meals, drinks, and conversation. Whether you’re planning a full outdoor kitchen with built-in appliances or a streamlined setup with a grill and counter space, the investment pays dividends in lifestyle quality and home value. This guide walks you through the essentials, from layout and appliances to materials and budget strategies, so you can build an outdoor kitchen that fits your space, skill level, and wallet. Let’s immerse.
Table of Contents
ToggleKey Takeaways
- A full outdoor kitchen requires five core components—grill, prep counter, refrigeration, storage, and seating—that form the backbone of any functional cooking space.
- Choose your grill type (charcoal, gas, or pellet) based on cooking style and maintenance tolerance, with costs ranging from $150–$1,500+ depending on features and durability.
- Apply the work triangle principle with no more than 26 total feet between prep, cook, and cleanup zones to ensure efficient workflow in your outdoor kitchen layout.
- Stainless steel, concrete, and stone are the best material choices for outdoor kitchen components, as they resist weather, rust, and require minimal maintenance over 10+ years.
- Start with a modest grill and portable refrigerator setup for $3,000–$5,000, then expand your outdoor kitchen as your budget and interests grow.
- Proper maintenance—wiping stainless surfaces, sealing counters annually, checking gas connections, and draining water lines in winter—extends your outdoor kitchen’s lifespan by years.
Essential Components Every Outdoor Kitchen Needs
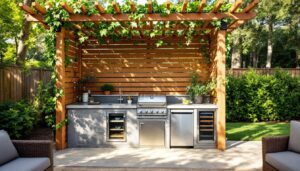
A fully functional outdoor kitchen doesn’t mean you need every gadget on the market. Start with the core elements: a grill, a food prep surface, refrigeration, storage, and seating. These five anchors form the backbone of any usable outdoor cooking space.
The grill is your centerpiece, whether it’s a charcoal kettle, gas unit, or pellet smoker depends on your cooking style and maintenance tolerance. A prep counter or island at least 24 inches deep and 3 feet long gives you room to work. Ideally, position it 3 feet away from the grill to keep heat and splatter off your ingredients.
Outdoor-grade refrigeration, a mini fridge, beverage cooler, or full-size unit rated for exterior use, prevents constant trips indoors. Include a sink with hot and cold water lines if possible: it’ll save hours of walking back inside. Storage should include weatherproof cabinetry (not just open shelves) for grilling tools, seasonings, and cleaning supplies. Finally, plan seating and eating space, a dining table, bar stools, or built-in benches make the kitchen feel like part of the entertaining zone, not a utility corner.
Choosing the Right Cooking Appliances and Grill Setup
Your grill is the hero of outdoor cooking, and the choice between charcoal, gas, and pellet models shapes both your experience and maintenance routine. Charcoal grills (like a classic Weber kettle) cost $150–$400, offer deep smoky flavor, and require patience and ash cleanup. Gas grills ($300–$1,500+) heat up fast, offer precise temperature control, and demand propane tank refills and periodic burner cleaning. Pellet grills ($400–$1,500+) use electricity and wood pellets for smoke and heat, blending ease with flavor, but they’re less portable and need a power outlet.
Beyond the primary grill, consider secondary appliances only if your budget and space allow. A side burner ($200–$500) for sauces and sides fits nicely into an island frame. A smoker attachment or dedicated smoker ($300–$800) rounds out your menu if you’re serious about ribs and brisket. An outdoor oven ($1,500–$5,000) opens possibilities for pizza and bread but requires structural planning and permanent installation.
Built-in grills are more durable and space-efficient than standalone units. They integrate flush into cabinetry, but installation costs rise $500–$2,000 for proper framing, ventilation, and gas lines. If you’re not ready to commit, a high-quality portable grill on a sturdy cart ($400–$800) lets you move it as your layout evolves. Either way, plan electrical and gas connections early, running new lines after construction is expensive and often requires a licensed contractor and permits.
Planning Your Layout for Functionality and Flow
The secret to a kitchen, indoor or outdoor, is the work triangle: distance between your prep, cook, and cleanup zones should total no more than 26 feet, with each leg 4–9 feet. Apply this to your outdoor space. Place your grill in a spot with good ventilation and away from the house (smoke shouldn’t drift through windows). Position your prep counter and sink on the opposite side from the grill to separate raw and cooked zones. Keep your fridge and cold storage within arm’s reach of both prep and serving areas.
Consider traffic flow around your kitchen. A patio or deck should have paths that don’t funnel guests through your cooking zone, position the grill and work surfaces to the perimeter if possible. Shade is critical: a large patio umbrella, pergola, or retractable awning keeps you comfortable during the hot hours when you’d otherwise abandon the kitchen. Plan electrical and water runs before pouring concrete or laying pavers, burying rough-in lines now costs far less than breaking up finished surfaces later.
Draft a simple overhead sketch with measurements. Include sun angles, wind patterns, and sightlines from your house and seating areas. A level site drains better and requires less grading: if your yard slopes, a small retaining wall or raised platform creates a flat, usable surface. Soil conditions matter too: clay-heavy yards need better drainage under pavers to prevent settling and cracking over time.
Materials and Durability Considerations
Outdoor kitchens live in weather, so material choice makes or breaks longevity. Stainless steel is the gold standard for appliances, sinks, and hardware, it resists rust and salt spray better than painted or powder-coated finishes. Budget $200–$500 more for stainless components, but they’ll look good and function reliably for 10+ years.
For cabinetry and counter surfaces, concrete ($50–$150 per square foot installed) offers durability and customization but needs sealing every 2–3 years. Tile or stone ($60–$200 per square foot) is heat-resistant and low-maintenance once sealed: granite or porcelain withstand freezing and thawing better than porous stone like limestone. Composite materials designed for outdoor use ($100–$300 per square foot) mimic wood without rot and splinter risk, though UV exposure can fade color over time.
Framing and structural components should use pressure-treated lumber (rated for ground contact) or composite decking materials. Avoid untreated wood: it rots in 3–5 years in humid climates. If building with stone or brick, use Type N mortar (not Type S), which allows for thermal expansion in outdoor temperature swings, improper mortar leads to cracking and spalling.
For countertop bases and island frames, poured concrete provides rock-solid stability and accepts any finish. Wood or composite frames require solid footings below the frost line (typically 12–48 inches deep depending on your zone) to prevent heaving in winter. Check local building codes or ask a contractor about your frost depth, getting this wrong means a wobbly kitchen by spring.
Budget-Friendly Design Tips Without Sacrificing Quality
A full outdoor kitchen can top $10,000–$20,000, but strategic choices trim costs without cutting corners. Start with a modest-sized grill ($400–$800) from a trusted brand rather than a premium built-in unit: you’ll get 90% of the cooking capability at half the cost. Pair it with a simple stainless prep counter and portable refrigerator instead of a full built-in system. This approach keeps your first build under $3,000–$5,000, and you can expand later.
DIY the structure, outsource the technical work. Building concrete pads, laying pavers, or framing a wood island are manageable weekend projects. Gas line and electrical connections require licensed professionals in most jurisdictions, don’t skimp here. Pulling permits ($100–$500) is tedious but protects resale value and avoids costly code violations. A comprehensive design from a local landscape architect ($500–$1,500) prevents expensive mistakes like poor drainage or undersized foundations.
Choose durable basics over trendy finishes. Stainless steel, concrete, and weathered wood age gracefully: they hide stains and patina better than high-gloss paint or polished finishes. Bulk-buy supplies (gravel, mulch, mortar) if you’re doing multiple projects at once. Shop end-of-season sales on outdoor furniture and grills (late August and October are prime). Consider refurbished or floor-model appliances from local dealers, they carry manufacturer warranties but save 15–30% off retail. Gardenista’s outdoor kitchens design guide offers budget-conscious layout ideas for customizing your space.
Finishing Touches and Maintenance Essentials
Lighting, shade, and seating elevate an outdoor kitchen from functional to inviting. Install low-voltage LED deck lights or string lights around seating areas (solar options cost $100–$300 and require no wiring). A permanent pergola or pergola shade structure ($2,000–$5,000 installed) provides relief from afternoon sun and frames your kitchen visually. If budget is tight, a large retractable patio umbrella ($300–$800) does the job while staying flexible.
Maintenance habits determine longevity. After each use, wipe down stainless surfaces with a damp cloth and dry immediately, salt and minerals leave water marks. Cover your grill when not in use (a fitted cover runs $50–$150) to protect from sun damage and debris. Seal concrete counters and stone annually with appropriate sealers ($100–$300 per application for professional sealing, or $30–$50 for DIY). Check gas connections yearly with soapy water (bubbles indicate leaks): if found, shut off the tank and call a professional.
In winter or off-season, drain water lines to prevent freeze damage, and store removable items (grates, tools, outdoor refrigerator) indoors if you live in a cold climate. Resources like Better Homes & Gardens and Hunker offer seasonal maintenance checklists and refresh ideas. A small investment in covers and care routines extends your kitchen’s life by years and keeps it looking like new through multiple seasons.
Conclusion
Building an outdoor kitchen is a rewarding project that blends design, function, and craftsmanship. Start with the essentials, a solid grill, prep space, and storage, then expand as your budget and interests allow. Plan your layout for flow and durability, choose weather-resistant materials, and don’t skip the permits and professional connections you need. With thoughtful design and realistic expectations about your skill level, you’ll create a space where cooking becomes entertainment and memories happen outdoors.